How to Customize the Dock with Terminal on Mac
There is no need to use dedicated utility to make changes to the behavior of the Dock. Some terminal commands allow you to customize various ways in the dock which allows you to view the items most frequently used.
On the web, there are many shareware utilities that allow you to customize and not in various ways the dock. The majority of these utilities actually do nothing but invoke internal commands using OS X which is in many ways can customize the appearance and operation of the Dock.
If you are not afraid with the serial terminal, here is some interesting commands. After performing many commands you need to close and restart the dock to activate your changes. To do this just type :
(Note the capital letter in the ” D ” Dock); The Dock will disappear briefly and then reload.
killall Dock
Enable 2D mode.
In the early years of the life of the OS X dock was fairly flat, with icons represented as two-dimensional. In 2007, by then in OS X 10.5 Leopard, Apple has set up a sort of 3D effect: do not change the functionality and appearance may like it or not. Anyway using the terminal we can get back to the style of the past: Just type :
defaults write com.apple.dock no-glass -boolean YES
Restart the dock as mentioned above with the command ” killall Dock ” .
To restore the previous state, the command is:
defaults write com.apple.dock no-glass -boolean NO
And it is always necessary to close and restart the dock.

Show only active apps.
By default, the Dock displays all applications drag inside. thus showing both active applications, both inactive. If you want to restrict the dock actually the only application open, type:
defaults write com.apple.dock static-only -bool TRUE
Again, remember to restore the situation to change the ” TRUE ” with ” FALSE “.
Change the magnification level.
From the ” Dock ” pane of System Preferences, you can change the size of the dock and the level of magnification (the icons when the mouse pointer is positioned over them). By default, the maximum magnification is 128, but this value is editable. Open the terminal and type, for example:
defaults write com.apple.dock largesize -float 256
Change the position of the dock.
From the ” Dock ” pane of System Preferences, you can change position on the screen: left, bottom or right. By default, the Dock is positioned exactly in the center. Again, this setting can be changed, for example by aligning all right, or all to the left. In order to align it to the left, type:
defaults write com.apple.dock pinning -string start
In order to align it to the right, type:
defaults write com.apple.dock pinning -string end
To align as always (center), type:
defaults write com.apple.dock pinning -string middle

Hide apps.
A function is useful in applications cmd+H: using this combination it is possible to completely hide an application on the fly in the dock. By default, you cannot understand what in the dock are hidden applications and, which are not. You can change this behavior, writing:
defaults write com.apple.dock showhidden -bool true
The hidden application icons in the Dock will appear less bright. To recover the classical behavior, the command is:
defaults write com.apple.dock showhidden -bool false
A different animation to minimize windows.
One trick quite well known by those who use OS X is the ability to minimize windows (yellow button at the top left in the window) while holding down the SHIFT key: the effect will be presented in slow motion genius of closure.
If you do not like the effect of ” genius “, you can choose a different one by selecting from the ” Dock ” the voice of System Preferences ” you minimize windows using ” and selecting ” scale effect ” and ” genie effect “. A different animation is selected from the terminal by typing:
defaults write com.apple.dock mineffect suck
The animation in question is similar to the effect ” genius ” but the effect of ” backwash ” from the right side instead of the left (try it in slow motion to see the difference). Use the Dock Preferences to restore possibly the effects of default.
View the trash icon as always full.
The trash bin OS X changes depending on whether or not there are elements within it. If, for some reason, you like an icon ” static ” (always the same, regardless of whether inside or there are no elements), type:
defaults write com.apple.dock trash-full -bool YES
The trash icon will appear as a full, regardless of whether it is or not. For changes just change the Boolean operator final ” YES ” to ” NO ” .
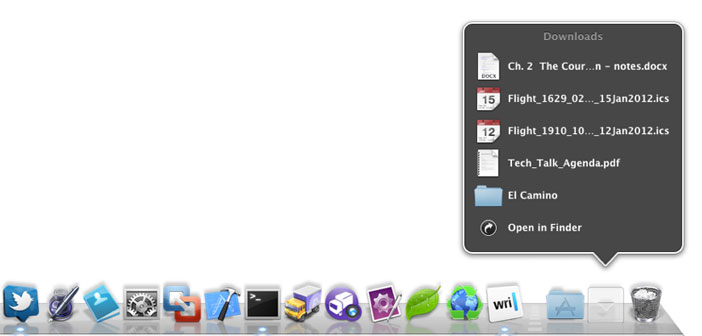
Add the indicator ” Recent Items ” to the dock.
Typing the following command:
defaults write com.apple.dock persistent-others -array-add ‘{ “tile-data” = { “list-type” = 1; }; “tile-type” = “recents-tile”; }’
Appears in the dock ” Recent Items ” from which you can view the latest applications or recently opened documents, and more. To eliminate this element, just do Ctrl + Click on this with the right mouse button or trackpad and choose ” Remove from Dock “.
Add spaces to the dock.
By default, OS X does not allow you to add blank spaces to the dock. This possibility is sometimes convenient because it allows you to better organise the icons, dividing, for example, for particular logical (software for internet graphics applications, utilities, etc….). To add a space, type:
defaults write com.apple.dock persistent-apps -array-add ‘{“tile-type”=”spacer-tile”;}’
After this command, the empty space will appear on the dock, can be moved and we will also create more spaces. To eliminate drag it up until you see the icon of the cloud and released.