How to change the iMac keyboard batteries
When you buy an iMac, you can get the keyboard, mouse and trackpad along with the screen you choose. All the devices are wireless, so none of these have wires that connect them to the computer but use the bluetooth connection (make sure this is active on your iMac).
They work using AA batteries. An Apple wireless keyboard requires two AA batteries to work. Make sure the batteries you use in the keyboard are of the same type and have the same level of charge.
You can use rechargeable batteries, although I’ve noticed that the battery level readings reported by Bluetooth are a bit off when I do. Standard AA alkaline batteries purchased in the store should last weeks (or even months) between replacements.
The keyboard also tends to run slower than the Apple mouse, which also uses two AA batteries. In this article, we will see in three simple steps how you can change the batteries to the keyboard of an iMac.
Turn on the keyboard
First, before you worry about replacing the batteries, let’s make sure that is the problem. Let’s try turning on the keyboard by pressing the power button on the right side: a green LED light will illuminate for a few moments.
If it turns on, the batteries are still functional, but we could check the remaining energy by clicking on the bluetooth icon in the top bar of our Mac: a drop-down menu will open that will allow us to view information about each wireless device connected to our computer.
If the batteries are almost dead, or they are completely empty, we move on to the second step, the first real step in which the actual replacement operation is carried out.
Remove the batteries
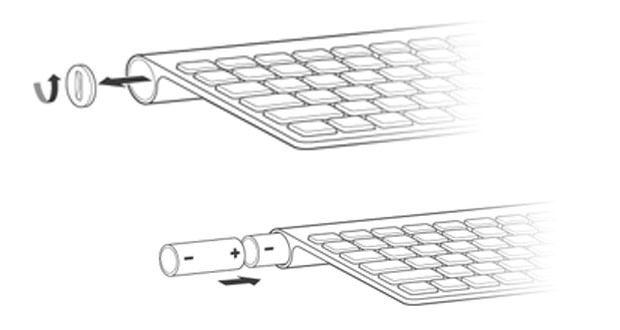
The first thing to do when the keyboard no longer turns on is to open the compartment where the two batteries needed for operation are located. To remove the cover, which is located on the left side of your keyboard, you need to have a coin handy, medium size (don’t trust the cents).
This will fit perfectly into the cut of the lid, and will allow you to unscrew it by making a counter-clockwise movement. When opened, it will be possible to tilt the keyboard and slide the two exhausted batteries outwards. A tip: always check the state of the batteries, possibly even measuring the energy left, so as not to throw away any more good batteries.
Replace the batteries
Do not miss the replacement of exhausted batteries with two new AA batteries, to slide one at a time into the appropriate housing. To make the keyboard work again, it is important that the positive side is placed on the correct side: to avoid mistakes, follow the explanatory drawings that you will find right on the keyboard near the housing.
At this point, do not miss that close the cover again, always using the coin and this time turning it clockwise, and try to activate the keyboard. If the green light turns on and the iMac recognizes the device, you are ready to resume your work.
Check the battery level
Alternatively, you can turn off the keyboard by holding down the power button located on the right side of the keyboard lift until the green light turns off. Unscrew the end from the opposite side of the lift using a coin or thumb.
Take out the old batteries and set them aside. Insert the new batteries with the positive side (the side with a protuberance) facing inwards. Screw the cap back on the keyboard and tighten. Press the power button until a green light appears above the eject button.
Wait a few seconds and your keyboard should automatically connect to your Mac. Once everything is connected, you can check the battery levels via the Bluetooth icon at the top of the screen. New batteries should reflect a 100% charge at the beginning.