How to record an audio track with Audacity
Many current operating systems contain a music player and a generic audio track editor among their pre-installed programs, these programs only contain basic functionality made available to the user.
A more experienced user may not be fully satisfied with it, looking for a slightly more complete and professional program. In this regard, it is possible to resort to Audacity, free software with great potential that offers the possibility to record and edit audio tracks almost at a professional level. It has a simple and intuitive graphic, making its main function attractive even to beginners who are delighted in this field.
In this short guide, we will see step by step how to proceed to record an audio track using the Audacity program.
Download and Install Audacity
The first step is essential and involves downloading the Audacity program from the following link: https://audacity.uptodown.com/windows. Just click on ” Download ” and start the installation. You can still download Audacity from any other website.
In both cases, we are talking about completely free software. There are different versions compatible with Linux and Windows, so also check the compatibility with your operating system.
After the installation in Windows, the Audacity icon will appear on the desktop or in the Start menu. Different is the case for Linux systems of the Ubuntu family, where you can find it among the multimedia programs for editing.
Initial Guide
The first time the program is opened, the user guide window will appear. If you do not want it to appear again in subsequent openings, you can check the box ” Do not show again at startup ” and confirm by clicking on the OK button. In subsequent uses, the guide will not appear automatically, but will still be accessible from the ” Help ” menu located in the Menu Bar (located at the top, as the last option).
Main Interface
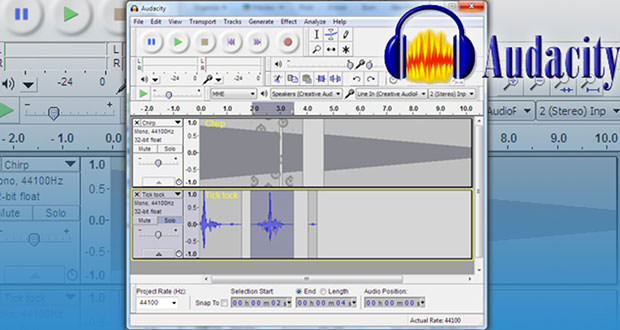
When you open the program, you will immediately find the main Audacity interface. You will notice right away that it contains many basic commands for recording and playback shown at the top left: pause/stop, play, and record.
If you prefer, you can already start experimenting with the aforementioned commands to get the first approach with the program’s functionality, before you start working seriously with this powerful editor, you should set up the sound sources and other parameters for recording.
Sound Sources
In order to make a good audio recording, these two components must be considered above all: the management of the audio sources and the volume adjustment for the sources. In both cases, the microphone will be managed independently of the speakers you have connected to the computer: the microphone is identified by a special icon, like the speakers.
It is also important to underline that, if you want to record only the audio that the computer emits from the speakers, you can do it without problems, reducing the microphone volume to zero.
Microphone and first recordings
To get better quality audio, you need to get a good microphone to connect to your PC. To add the voice to an audio track, just select the audio track you prefer and record your voice with the microphone. In the interface, you will notice that the two audio tracks are separate and easily manageable.
You could also add effects by selecting the audio part to add them to, go to the ” Effects ” section and choose the effect you want to insert.
For example: if you want to add the echo just click on ” Eco “, a window will appear in which you can choose the delay time, once you have clicked on ” Ok ” the loading of the effect will begin on the portion of the voice you have selected. Once the upload is complete, the echo effect will have been applied.
Saving
The last step is to save your audio file. Check before all your work is completed and needs no modification. Once this is done, to save it just click on ” File “, then ” Export “. Now choose the name of your audio recording, its saving destination, and its format. As for the latter, it is advisable to save it in the ” WAV (Microsoft) ” format. If you prefer to save it in ” MP3 ” format, you will need to download a fix on the Audacity program website.