How to install new fonts on the Mac
Have more different fonts to be used in text files and graphics is very useful to be able to customize our work with different characters.
Let’s see how to install them in a few simple steps to have them available in the various programs that we use.
1.) Having a collection of different fonts for each use is essential, both for business and personal documents. A particular character is essential to the presentation of a text and to communicate a specific message. So let us store a number of different fonts, divided into categories so you can easily find them, grouping them according to the characteristics and intended use. In this way we can also handle a large number of files, quickly finding what we need. We may also need special characters, such as accented letters for foreign languages. The first step then is to search the web fonts to add: can be downloaded for free, paying attention to the licenses, or purchased. Let versions suited to our pc and mac operating system because they use different extensions.
2.) Once you have downloaded the font, we will have to unzip it if necessary, just click on it to activate the decompression and then open the folder that contains the file to install. We read the txt document if present, which explains the possible uses of the font, for commercial purposes or not, and any information. Then we click on the file that contains the font. The most common extensions are ttf (true type font), otf (open type font) or TTC (true type collection). To install, simply select install font from the dialog box that opens with a double-click, we also have a preview of all the characters to decide whether to add it or not. The addition will be done so in an automatic way in the book font, which is the application that automatically handles all of these file types.
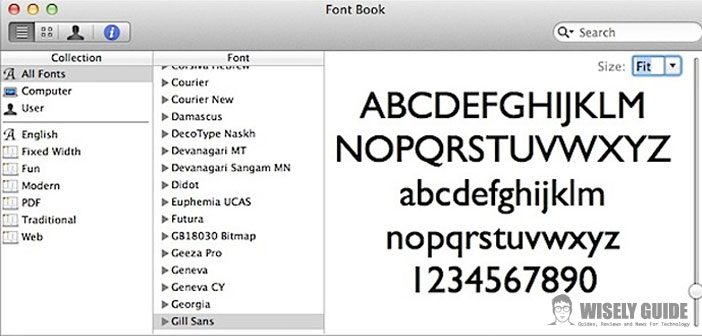
3.) To access the font go to Applications / Font Book: Here we can find all the fonts used by the programs installed in our operating system, divided into categories. To see the preview, just select it and it will appear in the center pane. Add fonts directly from the application, selecting the top menu add fonts. Here we can also validate them, remove duplicates and sort them into specific groups. Fonts can be disabled, enabled or removed simply by right-clicking on the name and select the desired option. Clicking with the right button in the list, we can create new categories and collections, or enable and disable existing ones. The fonts will be automatically available in the various applications installed in the system ..