How to draw with drawing tablets
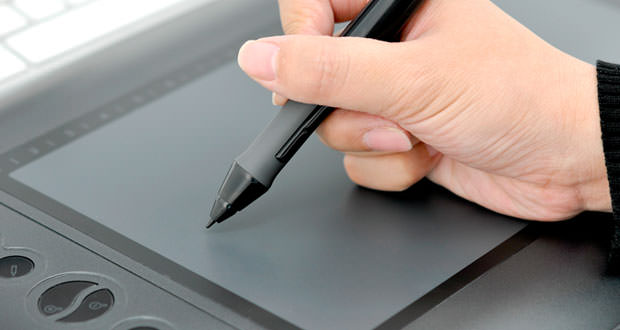
Graphics tablets are nothing more than devices, conceptually similar to the mouse. You connect to your PC or Mac, as it would allow you to draw freehand (using a light pen), sending information and seeing the result, directly on a screen.
The tablets have been widespread in the late 80s and the 90s of a last century. They were used by the CAD (Computer Aided Design) along with programs for technical drawings, such as Autocad.
In recent years, their use in this specific field has been reduced due to the increased sensitivity of the mouse and the advent of more and more advanced scanner. The tablet is not, it disappeared from the market, but it is ” transformed ” into an almost indispensable tool for modern graphics that use for freehand drawing, so replacing the paper. In this guide, we will explain how.
1.) Before you can use a tablet, it is obviously necessary to buy it. In the market, there are various types of tablets divided according to the use that they will do professional or not. Make no mistake in choosing the product is advisable to understand right away what will be used for the tablet. The main features that make cost variation are two: the active area and the number of pressure levels.
The active area is the surface ” useful ” on which to draw and, of course, a larger surface area corresponds a higher price (usually measures ranging from 157 to 98 mm. Up to 488 to 305 mm.). The pressure level (1,024 to 2,048 points) gives instead to stretch more or less smooth and rich detail. Based on these and other characteristics prices can be starting from a level ” base ” of about 50-60 dollars up to and exceed 2,500-3,000 dollars. In addition to the tablet will be necessary to have a software to manage it (one of the most popular is Adobe Photoshop, but there are many others). After connecting the device to your PC or Mac, you can start drawing.
2.) To familiarize yourself with the light pen, a useful tip is to start taking pictures instead of the mouse to perform all operations ” daily ” to the PC, such as opening folders, select file, etc. After a bit trained (especially for tracking and speed) will be easier to start drawing. The first step to make the sensitivity of the optical pen practically equal to that of a pen or a brush, is select (through software) the so-called option ” pressure “.
With this option, the pen will be able to ” hear ” each change of pressure of the hand on the sheet (or better on the tablet) and consequently to modulate the width of the portion displayed on the screen. It will also be possible to modify the inclination of the section to make it more or less frequently (such as happens with highlighters). At this point, you can select which ” tool ” you will want to use to draw (usually the pen, the pen or the brush). For each instrument, then you will have to choose its characteristics as the size of the tip or the width and softness of the bristles.
3.) The tablet menu or software which you served, you can also select a wealth of effects as the airbrush, sanding, dissemination, any ” noise “, etc. The advice is to start drawing without using special effects, limiting itself (at least the first works) to color scanned images. When you get more familiar with the choice of colors and features, you can enjoy all the effects you want, giving in this way to the designs your personal artistic flair.
To become good and excellent digital artists, a lot of training is essential because the necessary manual is a bit different from that used for drawing on paper. But never fear, training and perseverance will take you to get really good results!