How to format a bulk archive using DOS
For mass storage, we usually mean all that series of peripherals to store our data, from classic USB sticks to external hard drives, but also SD and microSD cards. A mass archive is always useful to make backups from your PC, save photos and videos of our holidays, and more. But sometimes, we need to format our external device. Not everyone knows that in addition to the classic method via computer resources.
There is a more effective way to format your mass archive, using the DOS language and the Windows command prompt. Let’s see in this simple guide how to do it and the steps to follow. Formatting a mass archive is always a very complicated procedure, especially for the important data within it.
Before proceeding with proper formatting, we always recommend saving or making a backup of the data. If everything does not go well during the procedure and formatting, you do not lose all the documents or files there inside the archive. So let’s see below how to format a mass archive using DOS.
The Windows command
First of all, if you need to format with a different file system, NTFS is currently the standard Windows system. Just use this command: ” format X: /FS: NTFS. “ As before, if you want quick formatting, add ” /Q ” to the end of the command.
This will help you if you want to do a good job and want to be appreciated by everyone, good and bad. To format a file system and then a main archive of the operating system through Windows, we can use the command we wrote previously or ” format X: /FS: NTFS. “ This command is used to format within that Windows archive automatically.
The software
Please note that mass storage formatted in NTFS will be usable. But only on MAC systems for reading only (it will not be possible to delete or modify files). So do not install third-party software, which is not always reliable (with the risk of losing data).
So do not trust those who are unable to do their job, but only pride themselves on knowing how to do it well. The software is hazardous. You must not download them for simple formatting of a mass memory since they are not very useful regarding a mass memory inside the computer itself.
So, we advise you to stay away from all those guides or news that advise you to download external programs.
The procedure
At this point, we start our PC and wait for the loading to be complete, then go to the ” Start ” button and if we are using Windows 7. Type in the ” Search programs and files ” box the word ” cmd.exe. “ It will be an effortless and fast action. To do this, we must make sure we have all the right requirements. And not to have a dirty or gravy-stained criminal record.
Stained with sauce or dirty criminal record in the sense that we are the computer administrators, and we can continue with the formatting, or we can enter a program or rather within the mass memory.
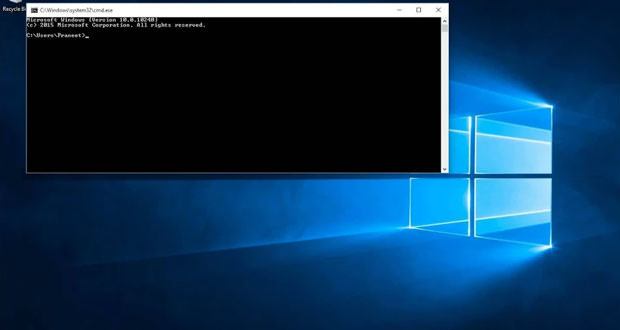
The command prompt
The result will appear, and we have to click on it to open the Windows command prompt. Another method is to look for the program in the program accessories folder. If we are using Windows 8, we find the program in all programs section.
If we use Windows 10, we do the right thing. Windows 10 is also backward compatible, retro reversible, and is considered a critique of the existing. Another essential thing when it finishes loading is to enter command prompts to start the so-called mass memory formatting. Through the command prompt, we can also see all the information that the mass memory contains.
The DOS window
Once the DOS window is open, we connect our mass archive, and then, through the computer resources, we display the letter that our computer has assigned to it (for example, the default letter of our internal hard disk should be C: ).
Once this procedure, we are saying that the DOS has been indicated with the letter C. The computer in default mode automatically assigns the letter C, but the administrators or those who have the computer’s full power can also change the name at will.
Formatting
So let’s go back to the command prompt and type the following command: ” format X: /FS: FAT32,” where instead of X, you will write the letter of your external device. With this command, the disk will be deeply formatted and, in FAT32, one of the most compatible file systems, but with some limitations since it cannot accommodate files larger than 4.7Gb.
Formatting can then be started with the following command that we wrote before: ” format X: /FS: FAT32 ” and remind you to change the X’s value where you have to put the letter of your external device. Once the command is started, formatting of the mass memory will begin.
The data on the archive
Deep formatting physically eliminates any data on the archive, making it impossible to recover, and for this reason, it is also very slow. There is also a command for a quick format, and it is the following: ” format X: /FS: FAT32 /Q “. Obviously, when we go to do the deep formatting or rather complete, it will also delete any data present on that memory.