How to Replace the SSD on MacBook Pro Retina
That slow my new MacBook Pro Retina! How many times this expression may have been uttered by a buyer the first time the stunning new purchase.
Oh yes, because the figure is high and the benefits that you will have in the future good, but when the power is inevitably slow, very slow. Replace the SSD component is an effective method for achieving optimum performance at power up, and especially when we decide to start programs particularly challenging for the system.
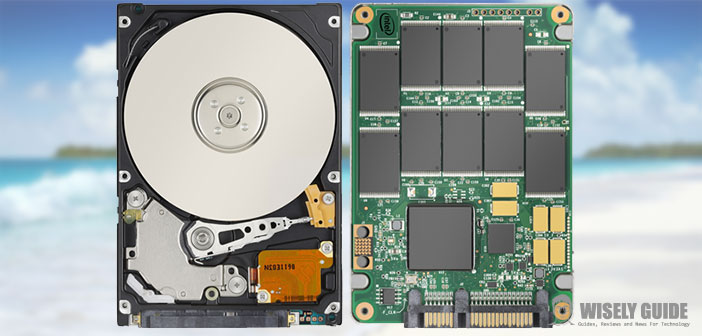
1.) Means SSD – Solid State Drive. It is a type of hard disk different from the traditional magnetic disk present in the computer. It is, moreover, even in the MacBook Pro and has a type of flash memory type, like that of USB flash drives, for instance. Its performance is much, much more than a hard disk ” canonical ” and this is one of the reasons that determines ignition ” lightning ” in a machine like the MacBook Air.
We must be aware that the model MacBook Pro Retina supports an SSD shaped a bit special, not the usual classic 2.5-inch drives. ” There are very few manufacturers that distribute these products (such as OWC) and their cost must be assessed.
The slowness of a car so great for many other points of view can be obviated by making this change purely mechanical, and enjoy a good speed without any problems. Here is the guide. Remember to assess the cost of the component and the dexterity that requires the change.
Remember, then, prior to purchase, to control the speed (3 GB or 6 GB). This factor depends on the person’s age of our laptop. Affordable if the model is estimated speed of 3 GB can be average, know many sites recommending carefully about the topic. If the speed is higher, you can focus on the components most gifted and effective.
2.) Now we proceed with the installation. That is, with the purely mechanical. We must give ourselves a screwdriver that will allow us to dismantle our Mac Do not forget to procure a copy of the operating system, and if we are scrupulous, a backup on an external disk data, we care about the most. Now we remove our cover.
The hard drive is located at the bottom left of your MacBook, and you cannot disconnect it as it is because you have to remove the top cover. You need to pay attention to a ribbon cable that connects the whole, then, gently. We remove the side screws that used to hold the SATA connector.
Once done, we can just replace the connector disconnected, connecting on our SSDs and reconnect the screws. Let’s put the new hard drive in its place along with the plastic holder and close the cover by tightening the screws very, very carefully. Proceed to restart our laptop by connecting the DVD or memory stick where we have put the operating system.
If there are good signs, we hold down the ALT key immediately after the startup sound and the system will allow us the choice to boot from USB or DVD, depending on what we choose to store the operating system. We choose and proceed. The system will now be much more responsive. Be as fast as we wanted at the time of purchase!
3.) The final tip is to optimize the SSD using specific programs, including slowing the deterioration. Now your laptop is equipped with an SSD system more capable, and then you can enjoy the best performance and features offered by the operating system Mac OS X..