How to Resize Photos for Printing on Posters
In the digital era, with the development of technologies, is increasing the number of people who, for pleasure or as a career choice, he approached the world of photography.
With the tools and graphics software that the PC offers, it is now possible to fully express their creativity, as long as sufficient knowledge of the use of the software.
One of the things that you might find yourself having to do is print posters or images at a larger size. In this guide, we will see how to optimize images for printing on poster.
1.) The basic requirement to print large, you have a detail of the image appropriately high. If we were to poster-size prints simply magnifying the image, we would end up with a poor quality due to lack of resolution. The key parameter to be taken into consideration, therefore, is not so much the size of the image, as the ” dots per inch “. Commonly known as DPI, or ” dots per inch “, representing the amount of dots printed on a line one inch long.
2.) The cameras on the market usually adopted as a standard measurement 72 dpi, ideal for printing of normal dimensions, resulting in excellent resolution. If you want to print the same image on large, it would take a different DPI, also in relation to the use that wants to do. If you wanted to print a billboard, this would be looked at by great distances, and you will have a good resolution even with a low value of IPR, whereas in the case of images that will be viewed from close distance, such as posters, need to high resolutions to obtain a good final quality.
3.) To print a poster of medium size, the ideal is to have about 300 DPI, so, not being able to change the DPI settings on the camera, we should use in the development of the specialized software camera. The most widely used program is Photoshop and intuitive on the market, and we’re going to take advantage of its potential to reach our goal: to print a poster ..
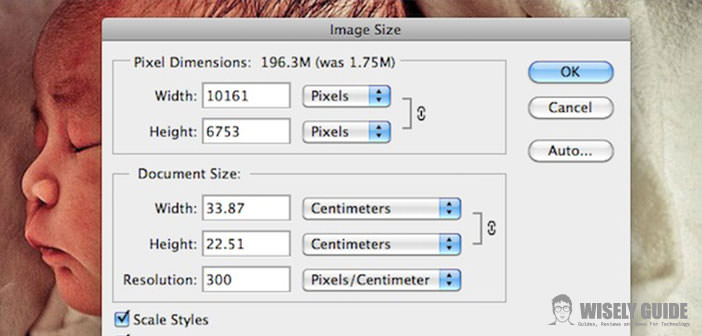
4.) After importing the image in Photoshop, on the command bar at the top select the command ” Image ” from the drop-down and choose ” Image Size “. At this point, it will open a window through which you can see and change the size and resolution of the photo. After choosing and entering the size of the poster that we would get a modify of the two dimensions of the document (the other will automatically adapt to the proportions of the image). Now our goal will be to increase the DPI, and to do that we leave the check mark to the ” Resample Image ” and We input the value you desire to obtain a resolution, or 300 pixels / inch.
5.) In this way, the software will increase the number of total pixels of the image interpolation operand, or create new pixels starting from the existing ones. It is important to choose the appropriate resampling among those that Photoshop provides. To achieve the best results. You should select the function Bicubic which, although slower, will give the best results in terms of quality.
6.) At this point, we are ready to print our posters. Of course, the printer will go to influence the final quality, so when you need to, you should contact professional print shops to get best results.