Setting date and time on your PC
The computer automatically sets the date and time, also by updating the change of daylight saving, retrieving the information from the time server on the internet.
In some cases, the PC cannot acquire such information and usually this occurs because of the battery Bios damaged or when for various reasons, such as if we lose the connection, the server cannot communicate with our computer.
Because having the correct date and time is essential for many applications, especially in order to run the updates, it is recommended to keep them synchronized and controlled. Let us see how to manually set the date and time with the Windows 8 operating systems.
1.) All settings necessary for the management of your PC are located in the Control Panel, including those relating to the date and time; The traditional way to access the control panel is clicking Start and typing in access research ” Set date and time ” . The fastest way to access the window that allows you to change the date and time is rather to just click on the time that appears in the bottom right of the screen (or taskbar) and select ” Change date and time settings “. From the window that you will also receive open select the Date Time tab.
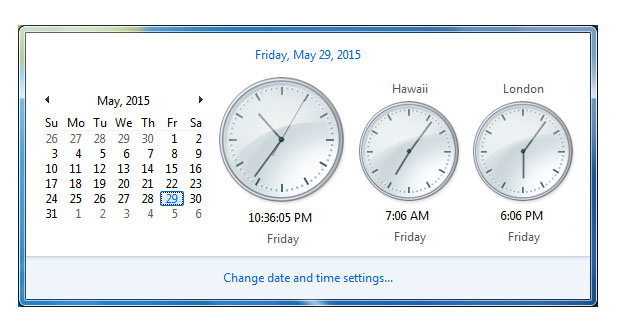
2.) To change the date just click the little arrow positioned to the right (to advance) and the left (backward) the month and year in the box calendar; to change the time you can advance or back one displayed by clicking on the arrows next to the checkbox (AM and PM indicates the afternoon shows at night) or enter it directly in the box by typing hours and minutes. To end dates, and the OK will save your changes. If you would rather change the area or time zone, click on the ” Change time zone ” and from the drop down menu, select the time zone of preference (based on hours of difference from UTC).
3.) Make sure that the checkbox is ticked that updates automatically to Daylight Saving Time and saved giving the OK. By default, Windows is set because it connects regularly with a time server, so that your system is always synchronized. You may also change this setting by entering the tab ” Internet Time ” and specifying the server of your choice. You also have the possibility to configure more clocks with different time zones (maximum 3) on the same computer, simply by selecting the window Date and time the tab ” Additional Clocks “.