How to configure Time Capsule
Time Capsule is a system that can be adapted to any internet connection model. It has a router, a Wi Fi access point and often, as an additional accessory, even a firewall.
So this program brings together everything that is needed for an Internet connection, except for the modem. It also has a 1 TB shared hard disk. This guide will show you how to configure the function on your computer.
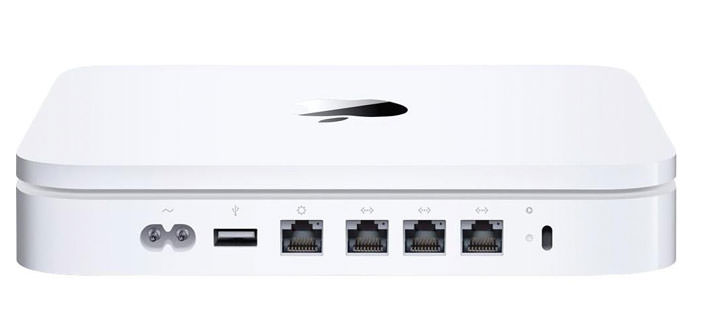
- Start by connecting the modem to the capsules. The port to use is WAN. Use the special Ethernet cable. Then with a second cable connect the time capsules to the MAC. A few moments from turning on the device you will see that the computer will read the program and start the Utility Airport. This program is present on every MacBook.
- You will be connected to a system configuration screen. You can follow the instructions or alternatively use manual mode. In this second case, click on the CMD + L keys. If you choose the fastest mode, ie the keys, a screen will open. Enter the modem IP address, router address, and DNS server. Or do not write anything in the ” domain name ” box.
- Always continuing with the manual configuration you can decide to create a new network or expand one already existing. Select ” Wireless Network Options ” and activate the Dual Band. It is important to remember to assign a new name to the second network. This will allow faster devices to surf the 5 GHz network. The 5 Ghz network is devoid of external interference. Instead slower devices will continue to navigate the old network. Finally, choose the firewall setting up a new password.
- If you want, you can activate an optional procedure by setting up the Mobile Me account in the appropriate area. This way, you can turn on services like ” back to my Mac ” without the need for other configurations.
- While the ethernet cable is still connected, you try to activate Time Machine on the Time Capsule disk. Make a backup, keeping in mind that it is a long enough procedure. Disconnect the Ethernet cable after the procedure is complete. Within the file where the ” shared ” function appears, you will find the Time Capsule icon. Click to log on to the backup disk. Done!
Product prices and availability are subject to change. Any price and availablility information displayed on Amazon at the time of purchase will apply to the purchase of any products.