How to replace the Battery of MacBook Pro
All technology lovers now know the MacBook Pro, which is the advanced line of notebook products from Apple. From April 2010, in addition to the adoption of i5 and i7 processors, the batteries of the MacBook Pro line have become the stars of a change that has given to the Cupertino company’s notebook autonomy variables from 8 to 10 hours, according to models.
Like all mobile devices, the battery is a delicate subject, especially for Apple devices, for which the replacement operation of the same is never easy, and often rely on a skilled technician involves high costs to say the least. This guide will explain how to replace the battery of a MacBook Pro, taking as an example the Pro 15” Unibody Mid 2010.
- The first thing to do is to obtain a Phillips screwdriver and start to remove the 10 screws on the rear shell of the device, which are used to secure the rear case to the lower one. Then lift the lower case near the air intake to remove the two retaining levers on the upper case and remove the case, taking care not to lose the screws.
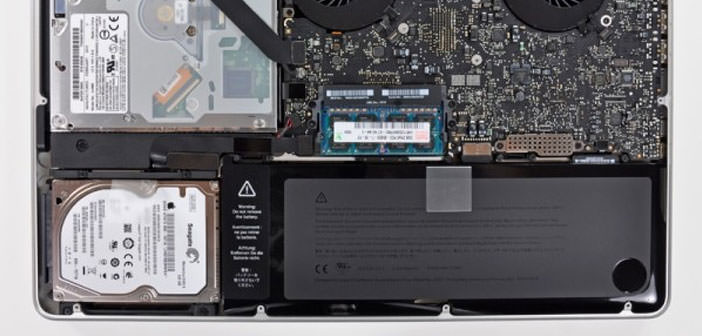
- At this point, it is necessary to remove the two screws that secure the battery 7.4mm diameter of the upper case, proceeding with extreme caution because the circuit is present electricity, and possible contacts may damage the circuit board. Lift a finger the warning label corner to make further hidden lives visible, then remove it.
- Taking advantage of the plastic tab, lift the battery and tilt it so as to make possible for the removal of the battery cable connector, in this female connector on the logic board, and then pull it out. At this point, you just have to place the new battery in place of the old, carefully attaching the connector to the logic board, tighten the screws previously removed with a Phillips screwdriver, retrieve the lower house and assemble it to the top making sure to leave more available all the screws initially removed.
- At this point, you have no choice but to tighten all 10 screws and check the correct operation of the new battery. In case you are not familiar with this type of operation, it is always advisable to rely on a qualified technician.
Note :
- Photographing the steps to avoid forgetting the position of the screws removed.
- Insert the screws removed in separate containers by type.